How to Verify Bottle Rinser Performance Before Filling
A bottle rinser should be accepted against its hygienic duty for the actual container family, not merely because bottles pass through wet. Define the incoming new-bottle condition, the hazards the rinse is intended to reduce, the approved water or air medium and the protected route to the filler. Then challenge inversion, nozzle alignment, internal coverage, supply conditions, drainage and fault handling at representative formats and operating states. The protocol should preserve raw observations and identify what the rinse cannot control. Bottled-water hygiene guidance and current plant requirements define the boundary; the rinser must never be represented as a substitute for suitable bottle manufacture, storage and handling.
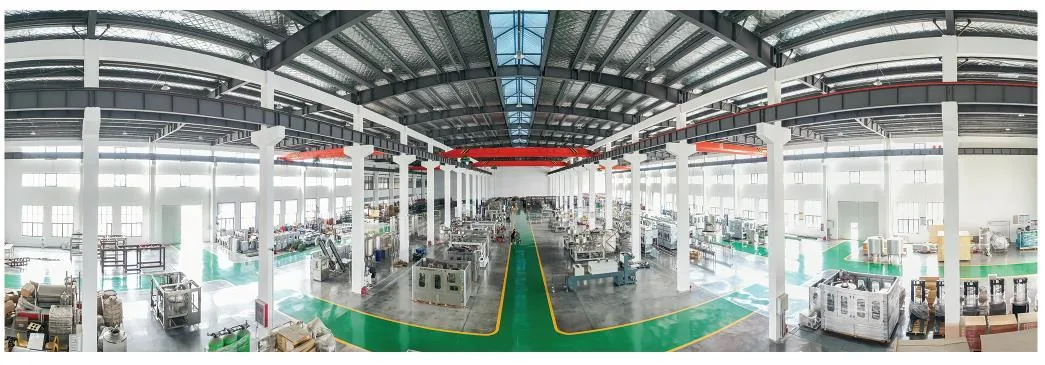
Real manufacturing reference from the Allot Tech Beverage Bottling Catalog 2026. Final equipment and layout remain project-specific.
01
Define what the rinser is expected to remove or control
Start with the supplied bottle state and contamination pathways from blowing or receipt through conveying. New bottles may carry loose particulates, storage debris or handling exposure, but the credible challenge depends on packaging controls. State whether the rinser uses product water, treated water, disinfectant, filtered air or another approved medium and what downstream protection follows.
Characterize incoming bottles
Document bottle source, packaging or inline-blowing route, storage, depalletizing, conveying and maximum exposure. Inspect representative formats for loose material and damage. Do not create an artificial acceptance challenge unrelated to the expected incoming condition unless it is clearly labeled as a diagnostic test.
Set the hygienic objective
Name the targeted condition and the evidence used to justify rinsing. Distinguish removal of loose foreign material from microbial or chemical treatment. A brief rinse cannot be claimed to sterilize a bottle without an appropriate validated process.
Qualify the rinse medium
Define microbiological, chemical and physical quality at the point of use, plus any treatment and monitoring. Assess disinfectant carryover where used. Supply quality at a utility room does not prove condition at the moving nozzle after hoses, valves and idle periods.
Map the post-rinse boundary
Identify the route, distance, exposure, overhead risks and interventions between inversion and filling. A successful rinse can be undone by an open conveyor, dirty guide, air jet, manual touch or prolonged stop before the filler.
02
Challenge coverage, mechanical presentation and drainage
Run the protocol with approved representative bottles, production guides and normal transfer. Include slow, normal and defined maximum conditions as relevant, startup, planned stops and restart. Use safe visible or analytical methods to demonstrate internal wetting or treatment without introducing material that could contaminate production equipment.
Verify bottle capture and inversion
Observe neck handling, stability, rotation and dwell for every qualified geometry. Look for partial inversion, slipping, deformation and damage. Record the exact change parts and settings; a result on one bottle does not qualify a materially different neck or height.
Confirm nozzle-to-opening alignment
Inspect alignment across all positions and after changeover. Challenge positional tolerance with the approved bottle dimensional range. Detect blocked, bent, dripping or weak nozzles using a defined method rather than relying on operator impression.
Demonstrate internal coverage
Select a safe tracer or observation method suited to the objective and verify relevant surfaces. Account for bottle ribs, handle features and geometry that create shadow zones. State method sensitivity and rinse-off controls so the challenge does not overstate actual removal.
Assess drain-down and carryover
Measure or classify residual rinse medium after the defined drain period under representative conditions. Evaluate dilution, chemistry and filler effects using the product specification and process risk. Do not invent one universal residual-volume limit.
Challenge
Evidence method
Acceptance basis
If evidence fails
Presentation and inversion
Position-by-position observation with qualified bottles
Format-specific mechanical requirement
Correct guides, grippers or settings and repeat
Nozzle delivery
Flow, pressure or suitable pattern check at point of use
Supplier-confirmed and test-derived envelope
Isolate blockage, supply or alignment cause
Internal treatment
Safe coverage or removal challenge
Risk-based hygienic objective
Revise geometry, dwell or stated capability
Drain and transfer
Residual assessment plus protected-route inspection
Product- and process-specific decision
Hold qualification; correct drain or exposure path
03
Verify supply controls, faults and rejected-bottle handling
The rinser needs controlled response when its medium or mechanics leave the accepted envelope. Test the installed instruments, alarms, interlocks and reject or stop logic. The team should know the product boundary after a fault, because bottles treated during low flow or an unrecognized nozzle failure may already be at the filler.
Challenge low or lost medium
Reduce or interrupt supply through an approved safe test and confirm detection, line response and recovery. Verify that an operator cannot acknowledge the alarm and continue without restoring acceptable conditions and addressing bottles already in transit.
Detect position-specific failure
Determine how a blocked nozzle, damaged gripper or persistent misalignment is identified. If automated detection is not available, establish an executable inspection frequency from risk and demonstrated failure behavior rather than assuming all positions remain equivalent.
Control rejected bottles
Ensure rejected or fallen bottles cannot be manually returned downstream without an approved route. Design bins, access and counts to prevent mix-up. Investigate recurring rejects by position, format and time instead of treating them only as waste.
Recover after stop or intervention
Define how exposed bottles, stagnant rinse medium and opened guards are handled. Inspect and hygienically restore touched parts as required, establish the bottle boundary and restart only after approved conditions are re-established.
04
Translate qualification into routine checks and change control
The final report should identify qualified formats, settings, operating envelope, method limits and unresolved exclusions. Convert these into changeover standards, checks, maintenance and trend review. The validation remains applicable only while the bottle, medium, nozzles, timing, software and transfer boundary remain materially equivalent.
Create a format setup standard
Record change parts, guide positions, nozzle selection, pressure or flow range, timing and visual references for each qualified bottle. Require independent confirmation of critical settings after changeover where risk justifies it.
Plan point-of-use hygiene checks
Monitor rinse-medium condition and hygienic state at locations and frequencies justified by risk and system history. Include idle and restart conditions. Trend results with sanitation and filler findings to detect a common upstream problem.
Maintain without losing alignment
Define inspection and replacement for nozzles, filters, grippers, bearings, guides and hoses. Control lubricant and maintenance debris. After intrusive work, verify mechanical and hygienic restoration before returning the rinser to service.
Requalify meaningful change
Assess new bottle geometry, neck finish, rinse chemistry, medium source, nozzle, speed, software, drain time or transfer layout. Use the original challenge rationale to decide the extent of testing; do not extend qualification by filename alone.
R
References and verification boundary
These sources support the risk-control method on this page. They do not set project-specific legal limits, test frequencies, engineering values or approvals; verify the current edition and local applicability before a decision.
No. It can support coverage evidence, but removal capability depends on the target material, medium, action, geometry and method. The claim must stay within the validated objective.
Can the rinser use ordinary plant air?
Only if a risk assessment and point-of-use specification show the air is suitable for the contact. Compressor-room pressure alone says nothing about particles, oil, water or microorganisms at the nozzle.
Should every bottle format be challenged?
Qualify each materially different geometry or justify a worst-case family using documented dimensions and test evidence. Do not assume the largest bottle is automatically worst for every failure mode.
What happens to bottles after a nozzle failure?
Use the detection time and conveyor path to define a conservative affected boundary, hold or reject those bottles, correct the cause and verify restoration before restart.
What inputs are needed for a rinser protocol?
Provide bottle and neck drawings, format matrix, incoming-bottle controls, rinse-medium specification, nozzle and transfer design, operating speeds, alarm logic, sanitation method and applicable hygiene criteria.
Move this project question forward
Need to resolve How to Verify Bottle Rinser Performance Before Filling for your water bottling plant?
The rinser needs controlled response when its medium or mechanics leave the accepted envelope. Test the installed instruments, alarms, interlocks and reject or stop logic. The team should know the product boundary after a fault, because bottles treated during low flow or an unrecognized nozzle failure may already be at the filler.
Not sure which data matters? Send what you have and state the decision you need to make.
2. Attach the decision inputs
Characterize incoming bottles
Verify bottle capture and inversion
Challenge low or lost medium
Create a format setup standard
Send target capacity and SKUs, source-water report, site utility schedule, building layout and required project milestones.
3. Confirm the next planning step
The project desk can identify missing inputs and a practical next step. Final engineering, configuration, compliance and commercial terms remain project-specific.